How to Use Jenkins to Build Your iOS App
A Beginner’s Guide to Effortless Development and Deployment. Let us discuss by step by step guide for Jenkins in this article:

A beginner's guide to understanding Jenkins and automatically generating .ipa files.
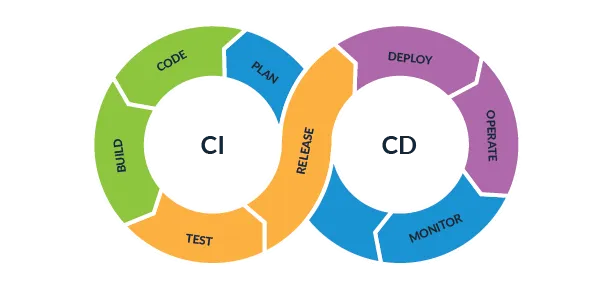
Why CI/CD?
CI/CD (Continuous Integration/Continuous Delivery) streamlines software development by automating the integration, testing, and delivery processes, ensuring faster, more reliable, and efficient deployment of software updates. It enhances collaboration, accelerates time-to-market, and minimizes errors through automated testing and continuous feedback loops.

Jenkins is an open-source CI/CD tool that helps automate tasks in terms of integration and deployment. Jenkins will be able to build → test → deploy the iOS application.
Jenkins ensures a reliable development pipeline by building the iOS application only when the associated test cases have successfully passed, maintaining the integrity and quality of the codebase.
Before getting into action, let’s understand GitHub and webhooks.
Configuring GitHub
Go to GitHub Repository and click on Settings

Click on Webhooks
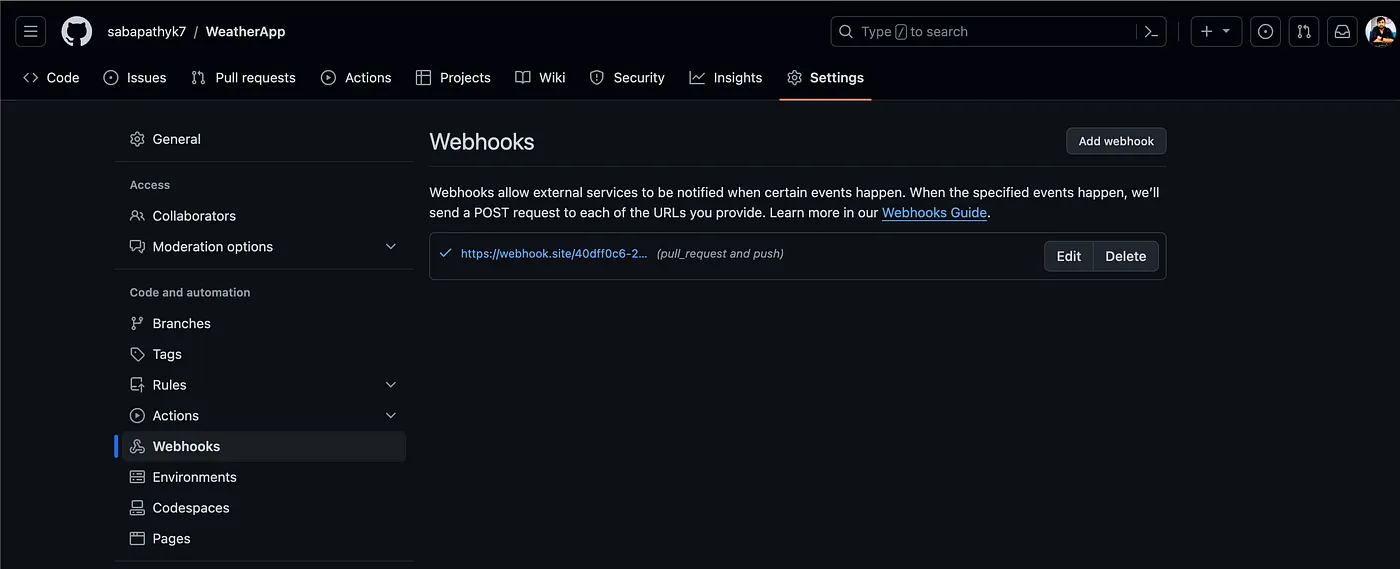
Click on Add webhook
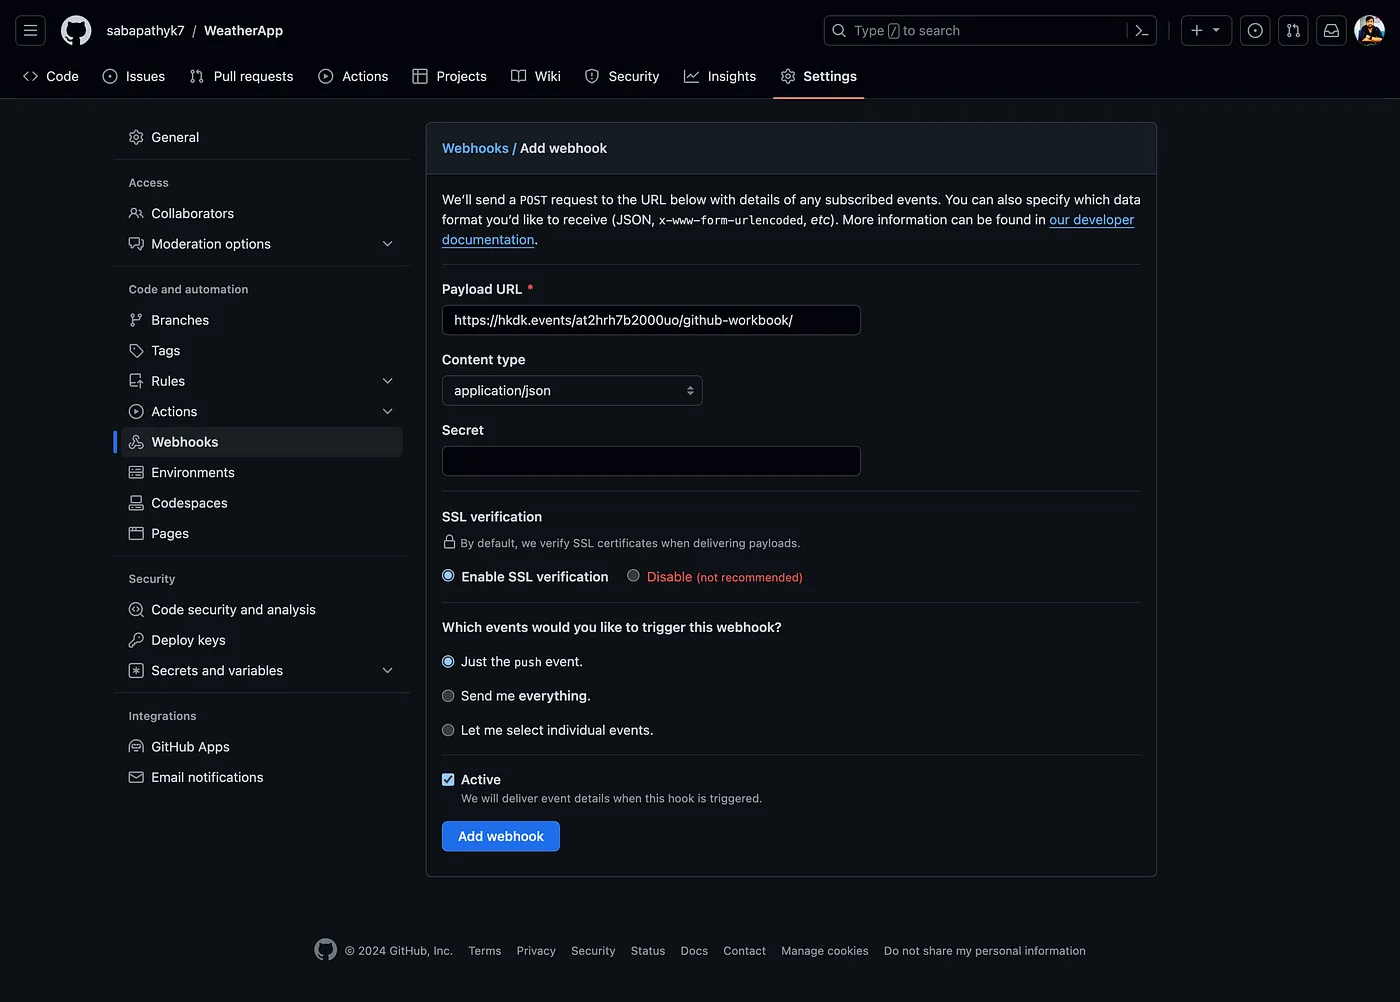
Refer webhook sites such as hookdeck or webhook.site). At the end of the URL, add /github-webhook/. In the ‘Content type’, select application/json.
You can select the individual events. I selected Pull Requests/Pushes. Make sure that the ‘Active’ option is checked and click on ‘Add webhook’.

Jenkins
Installing Jenkins
Download the latest stable build from the official website. I have installed it using the HomeBrew package manager.
Once the installation is done, navigate to http://localhost:8080/, your Jenkins local address.
Configuring Jenkins for iOS
To unwrap the password, use the following on the terminal
sudo cat /Users/YOUR_USER_NAME/.jenkins/secrets/initialAdminPassword
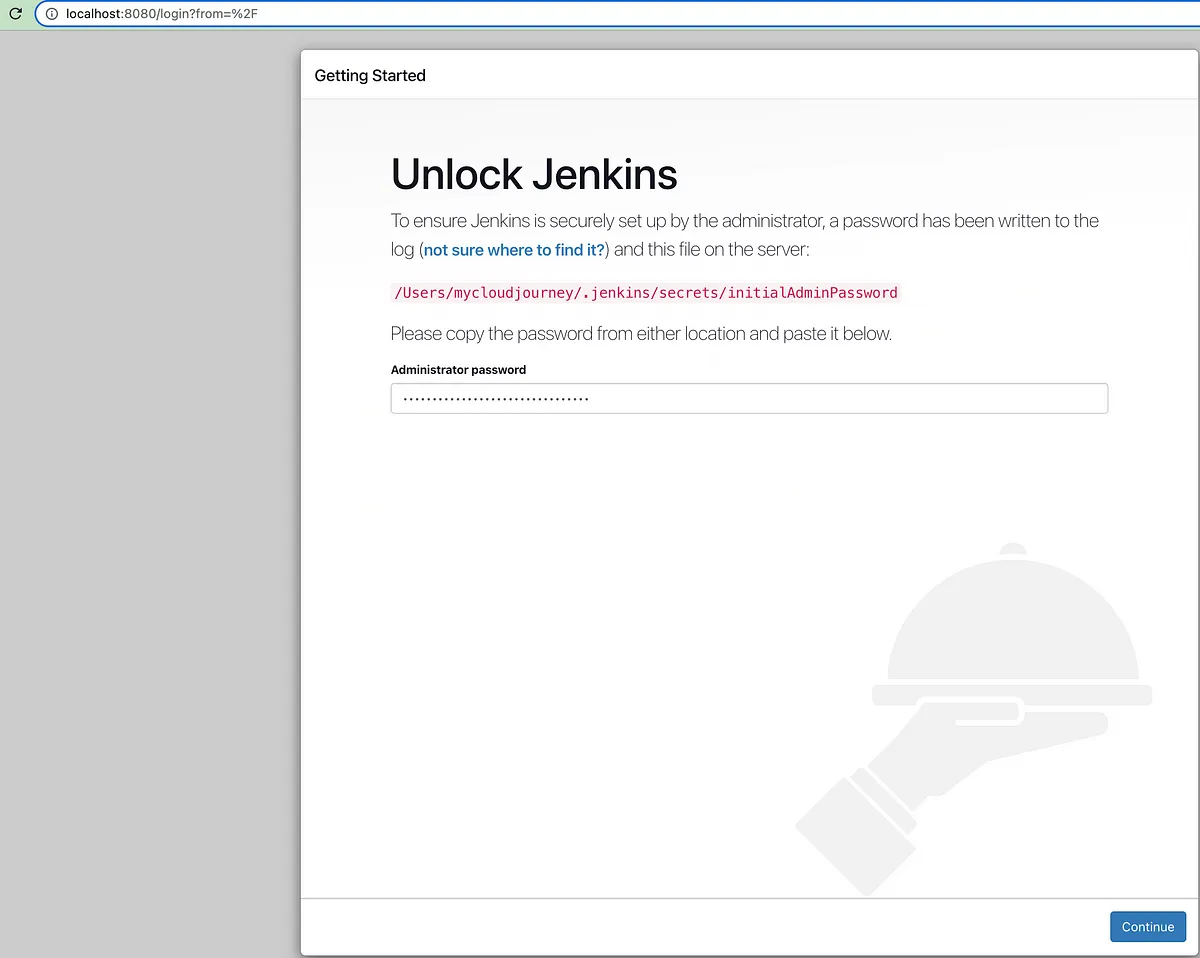
I have selected the ‘Install suggested plugins’ option in the next window.
Manage Jenkins
Select Manage Jenkins and then click Plugins in the options.
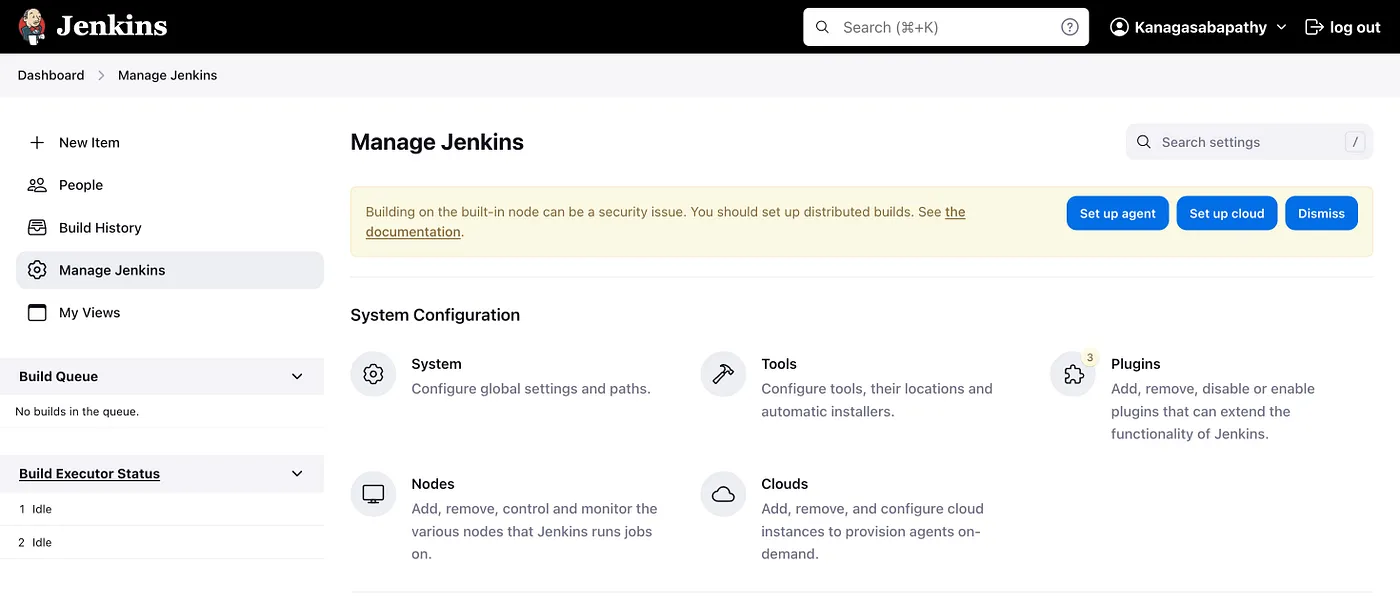
Click on Available Plugins, select Xcode Integration and install it.

Creating a Jenkins Job
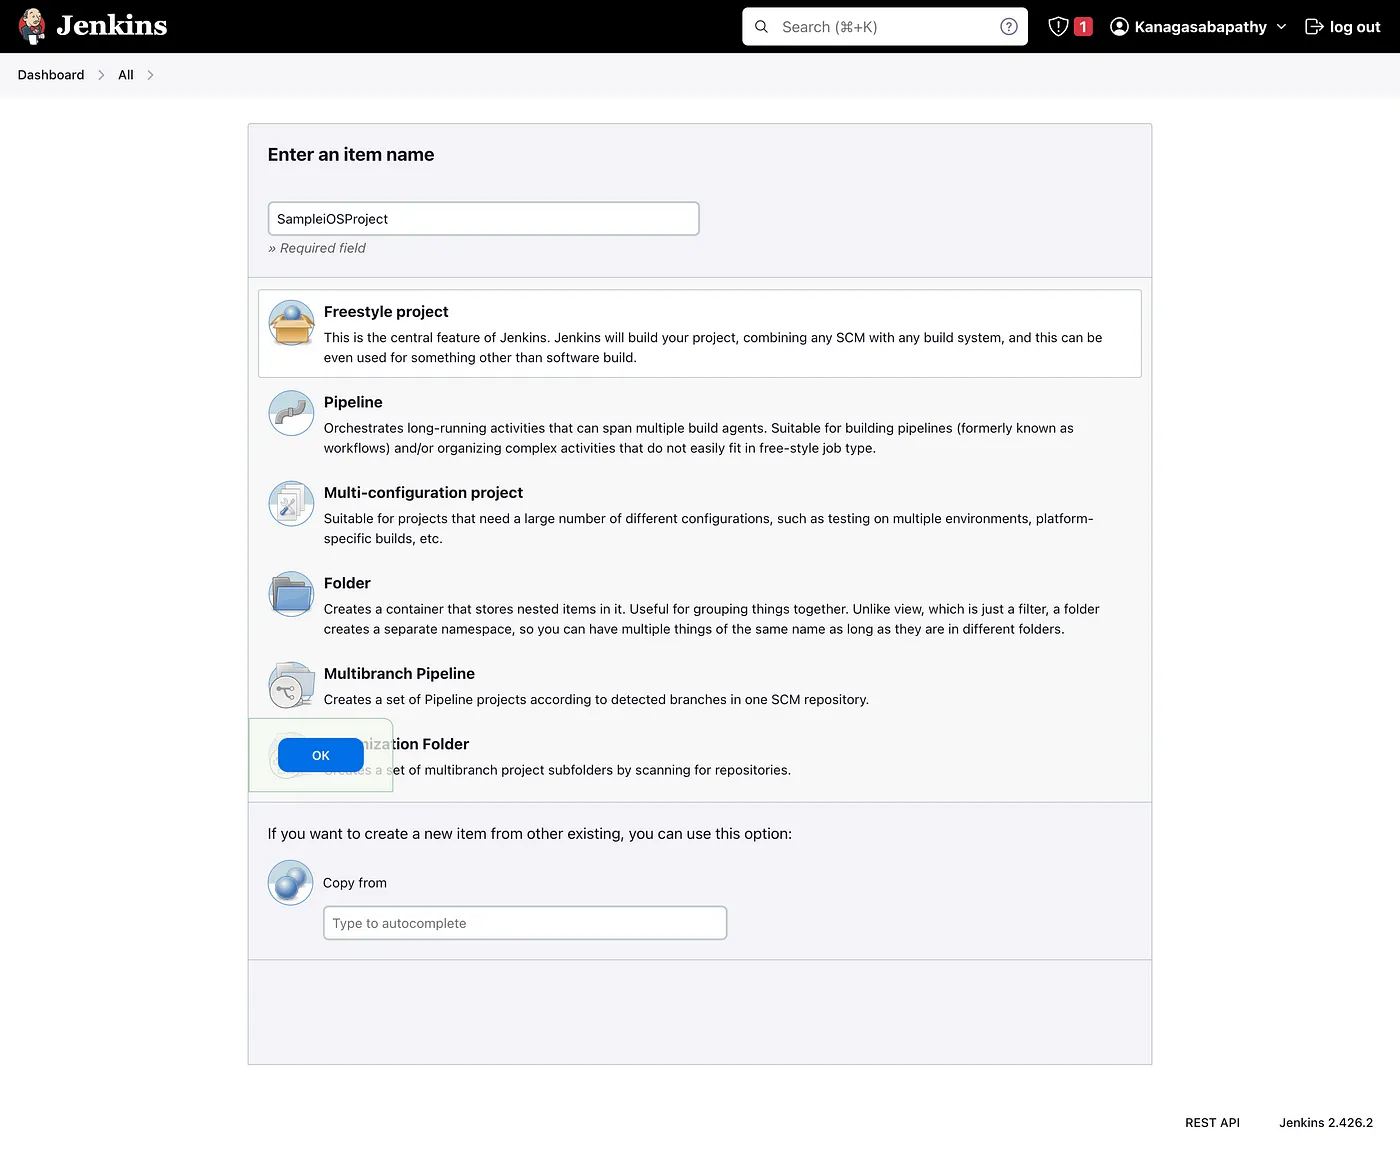
On Jenkins Dashboard, select New Item. Select Freestyle Project and provide a name to create a job.
Integrating Version Control
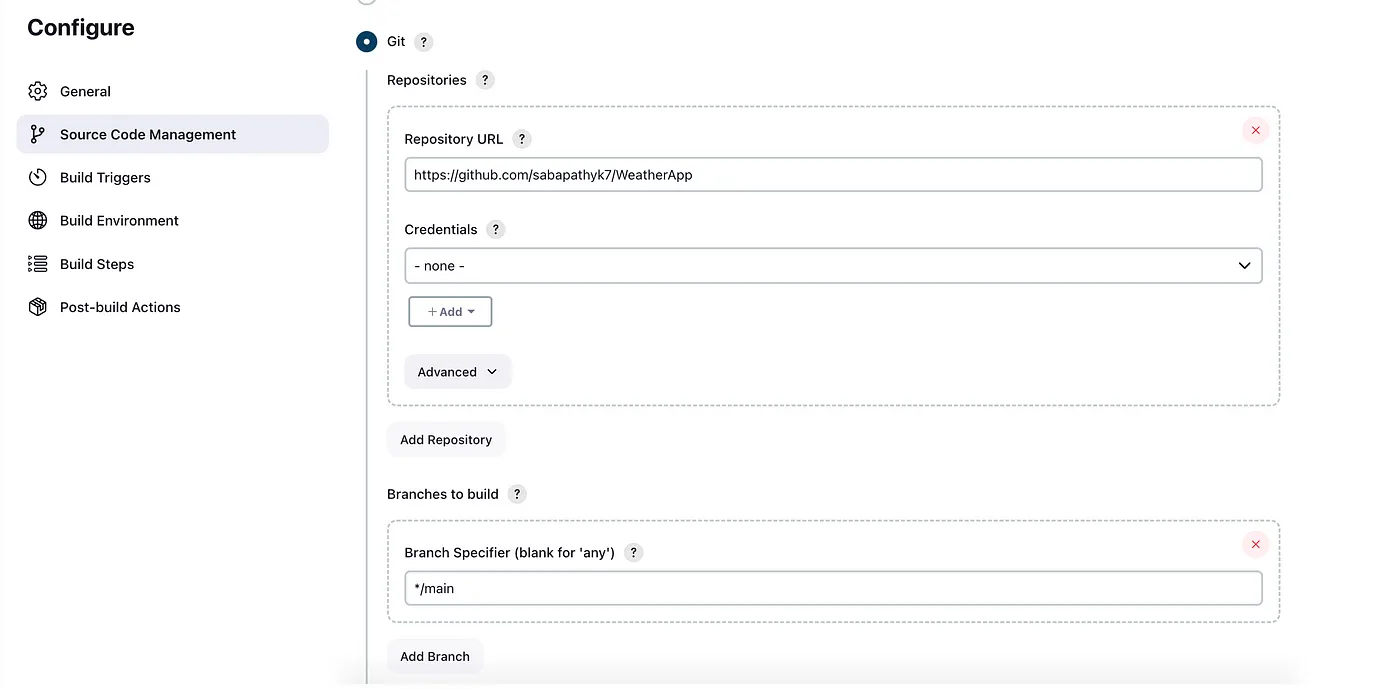
Click on the Source Management
Select Git and Add your Repository URL.
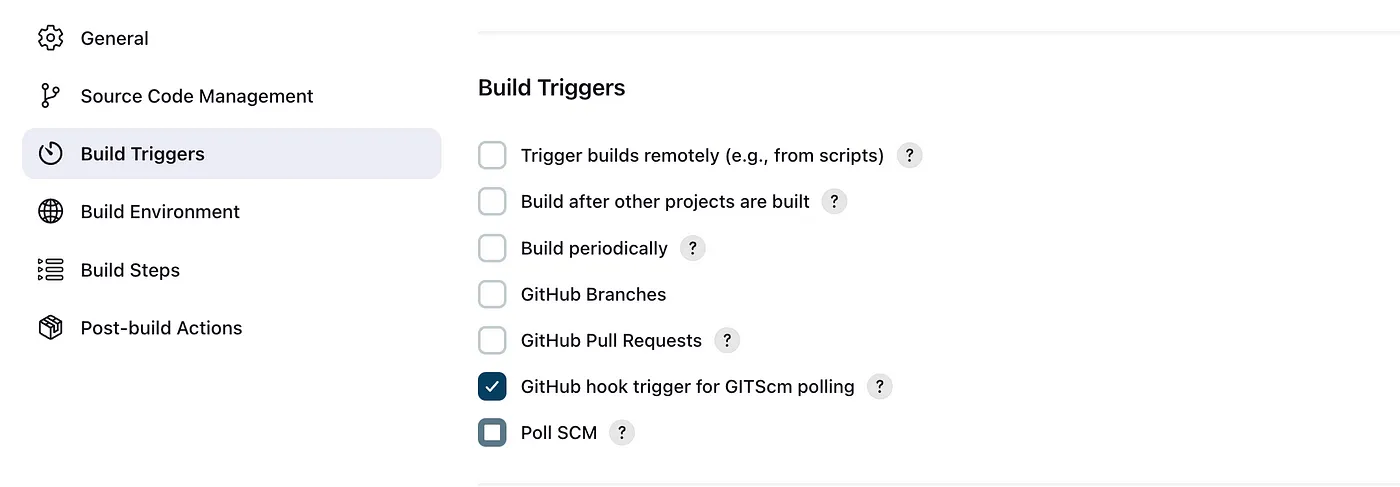
Click on the Build Triggers to trigger the events. We can select the ‘GitHub hook trigger for GITScm Polling’ to check the webhook events.
Now, our GitHub repository is integrated with the Jenkins project.
With GitHub and Jenkins integration, we can trigger the Jenkins job to run with every commit.
Xcode Integration Plugin with Jenkins
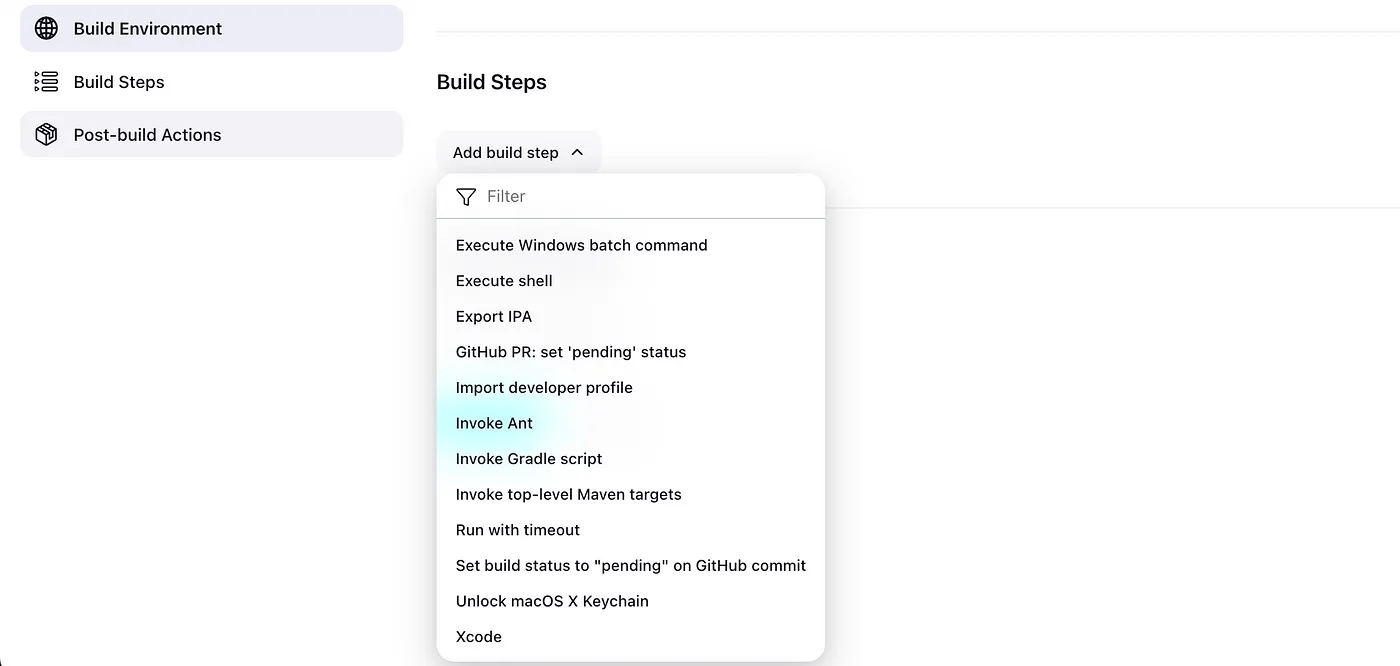
Go to Build Steps → Add Build step → Xcode
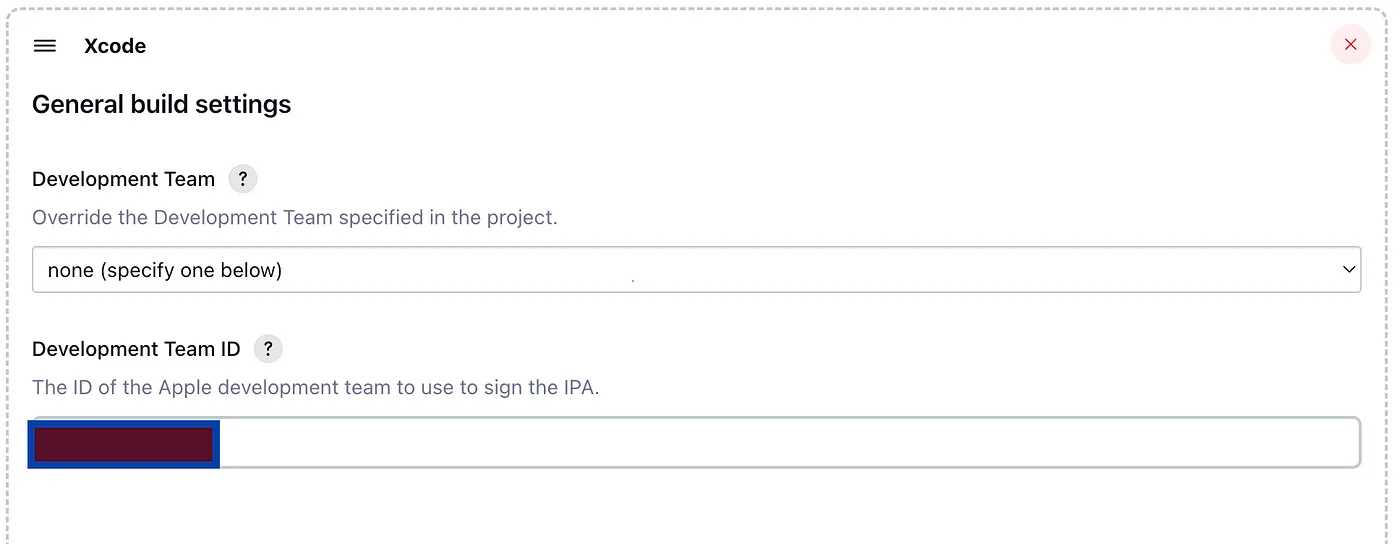
In General build settings, update the necessary fields.
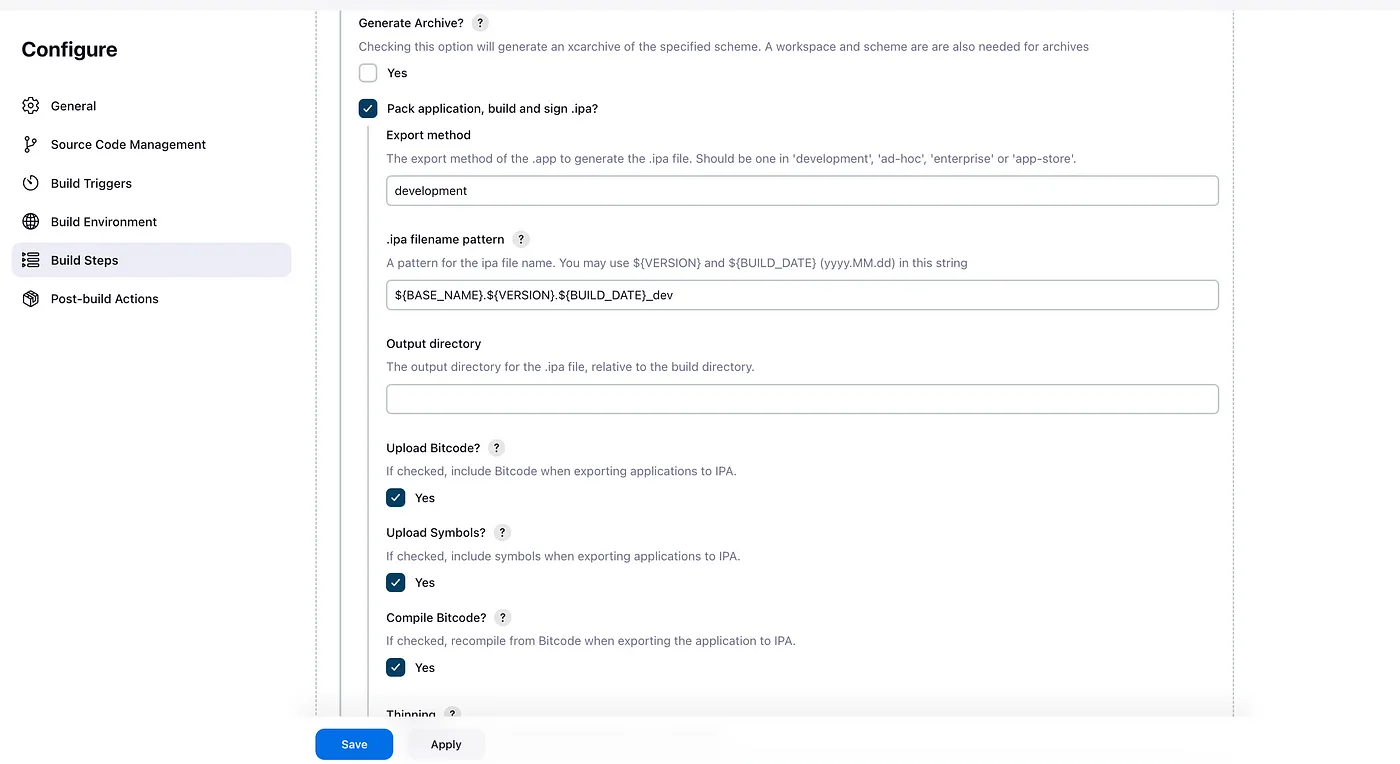
Check the Pack application, build and sign .ipa
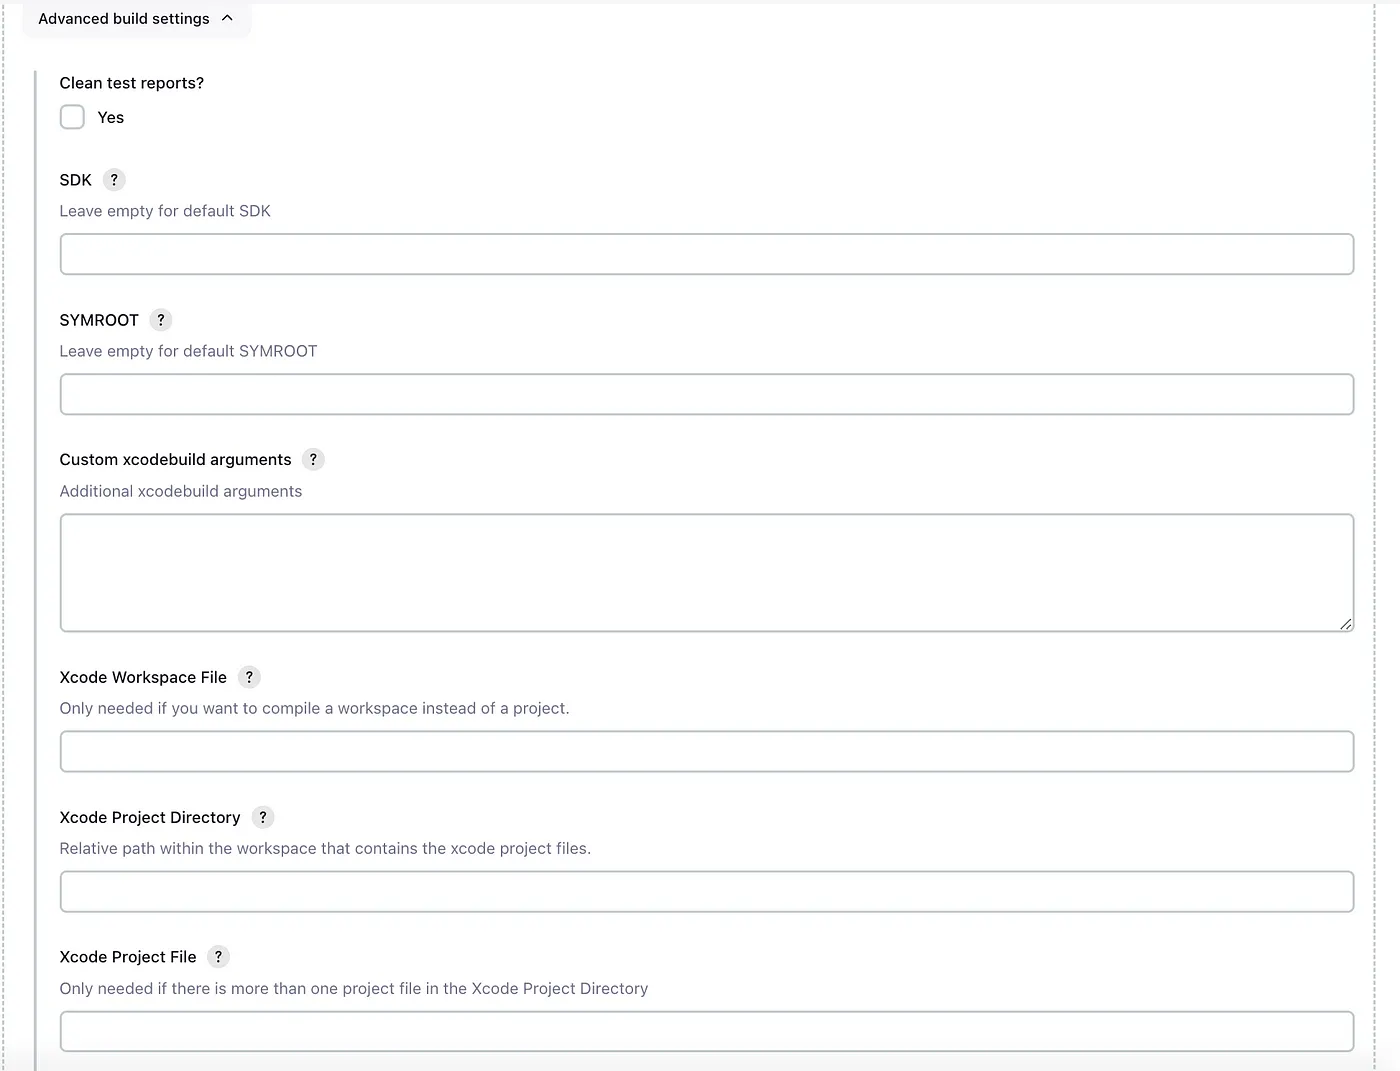
If you need to enter values for advanced build settings in Xcode, you can do so by filling out the fields related to the workspace.
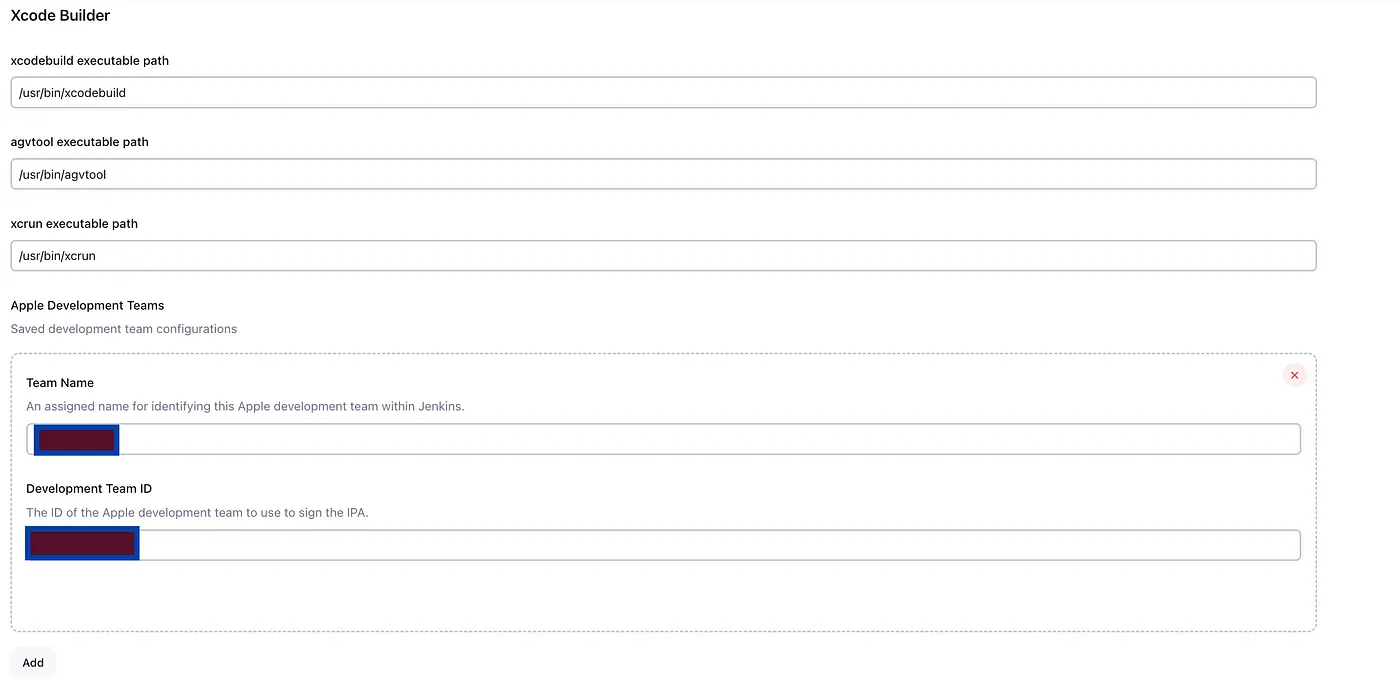
Move to Jenkins Dashboard > Manage Jenkins > System
This will help to configure the Xcode Builder. Add Team Name and Development Team ID.
Add Keychain and fill out valid values for Keychain Name and Keychain password.
Note: The keychain path is already present.
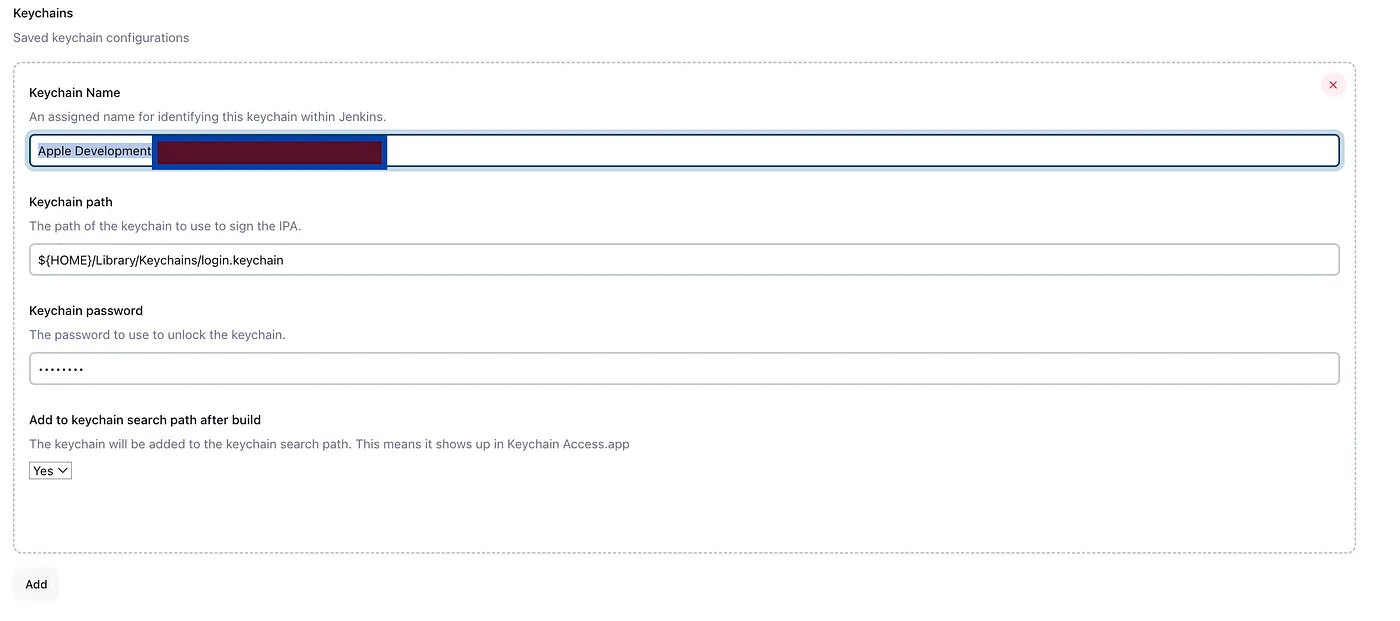
Apply the changes and save.
Use this link to fetch the member ID.
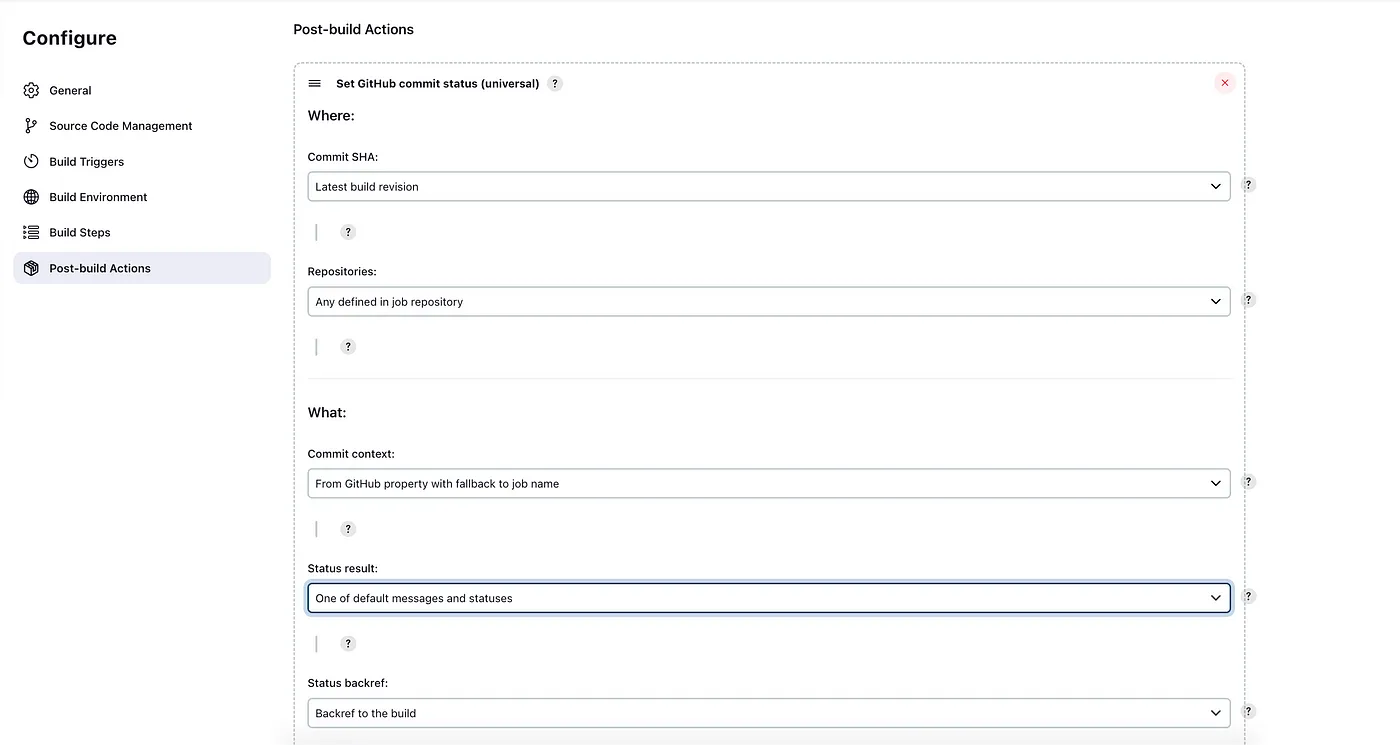
Post-build Actions
Under Post-build actions, select Set GitHub commit status (universal). Under the What: section, set Status result: to One of default messages and statuses.
After saving this, run the build
Build Now

Jenkins Dashboard — Successful Build

Console Output
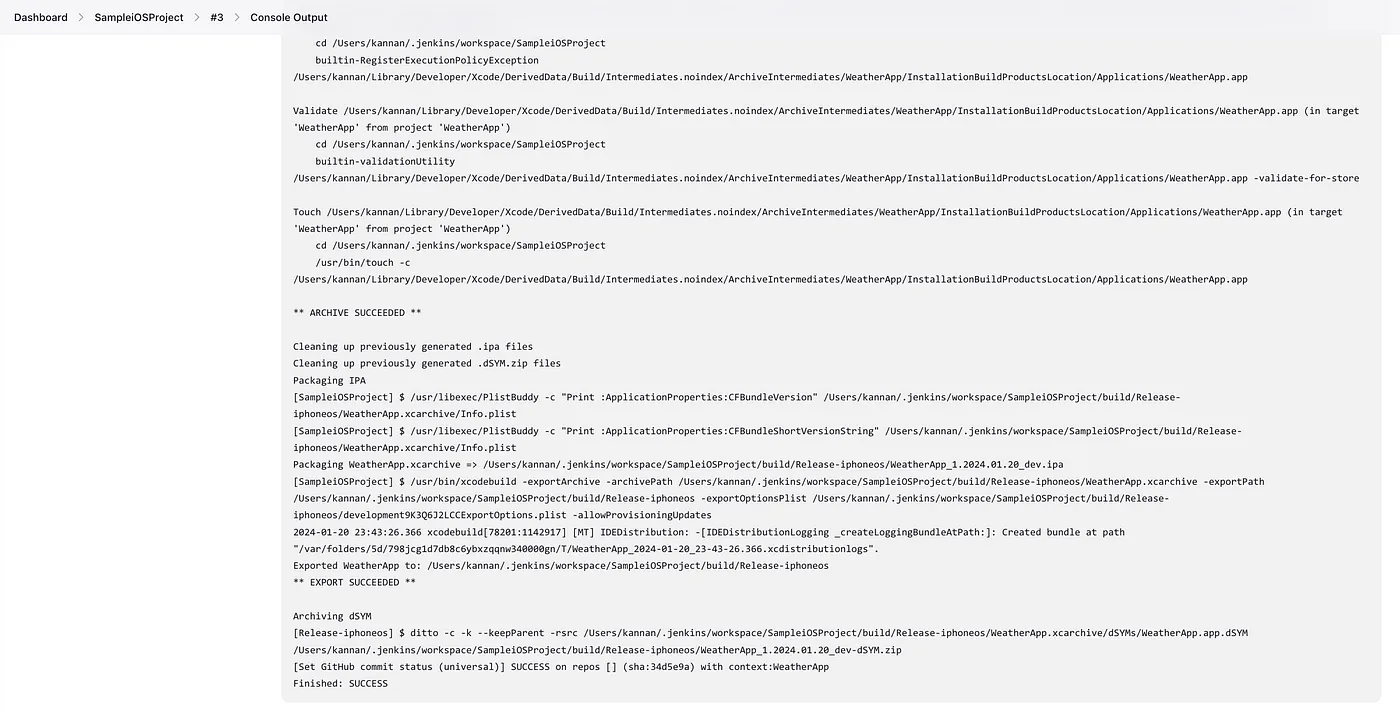
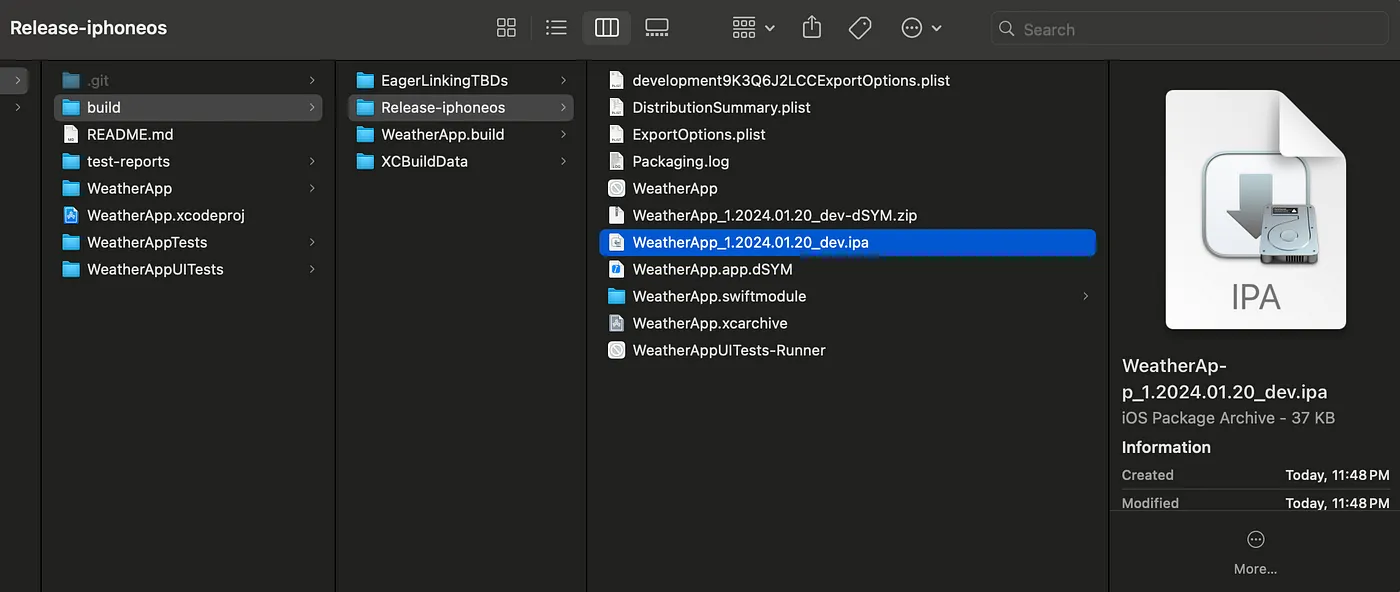
The build is ready and .ipa has been generated successfully.
/Users/{USERNAME}/.jenkins/workspace/SampleiOSProject/build/Release-iphoneos/WeatherApp_1.2024.01.20_dev.ipa
Triggering Jenkins GitHub Integration with Pushes
Now we are set with the GitHub Integration, Jenkins and Xcode along with Webhook.
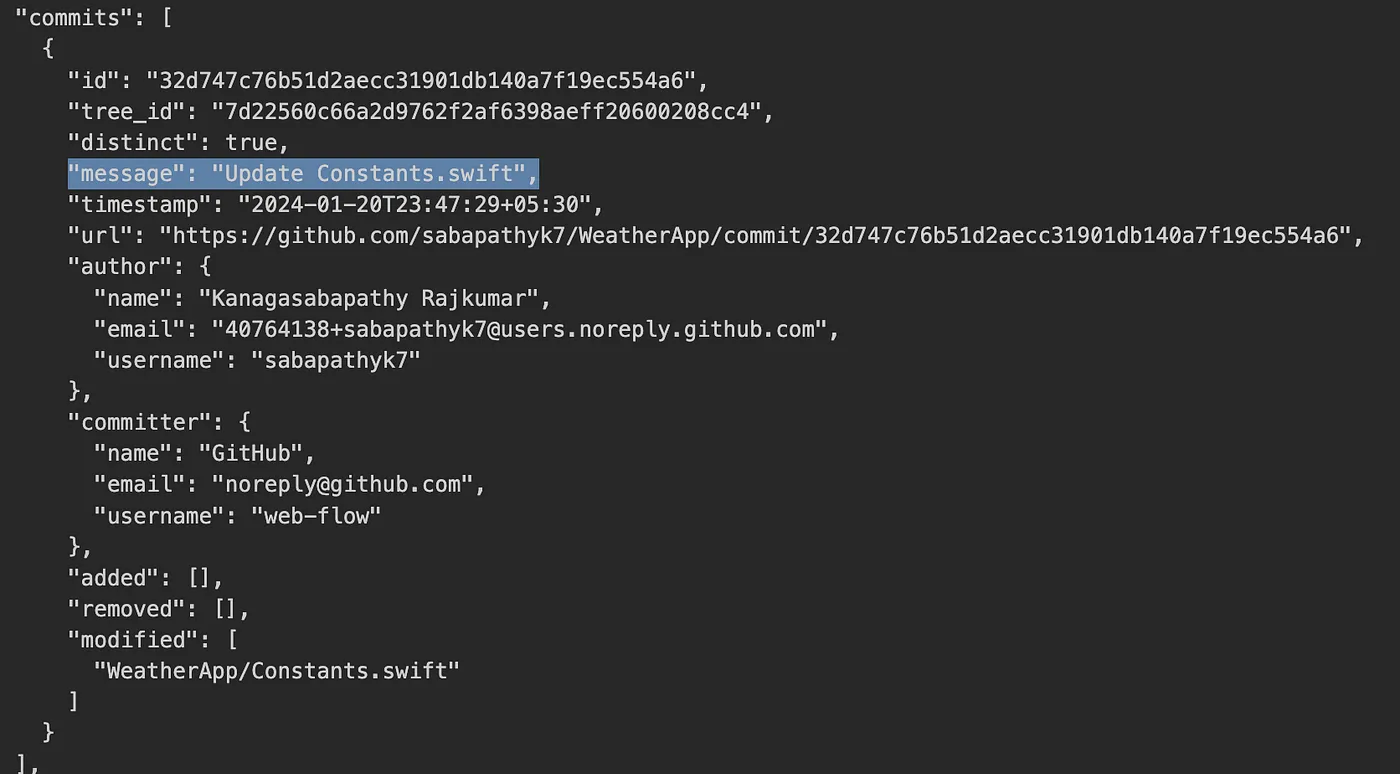
Let’s try the push from GitHub and check the results in the webhook requests.
This article introduces Jenkins and explains its integration with GitHub and the Xcode plugins.
I will cover how to automatically create Jenkins jobs for pull requests or push commits in GitHub in my upcoming article.
Automatically generated .ipa file using Jenkins
The entire project can be found here
This is a free third party commenting service we are using for you, which needs you to sign in to post a comment, but the good bit is you can stay anonymous while commenting.

