How To Simulate Location in Xcode and Simulator
When working on an app that requires it to point it to a specific location or simulate a custom location movement, it's tedious to set it up manually in a simulator or on iOS devices every time. We have a few ways to sort them quickly once so that you and your team can point to multiple locations after that.
Static Location Simulation
When we want to point to a custom static location, we have two options:
- Default static location
- Custom static location
Default static location
Xcode comes with a few default cities to help simulate locations. It can be done in three ways:
By editing schemes
Navigate to the Edit scheme by taping on the Product Menu and in the Run menu under the Options tab, as shown in the below screenshot:

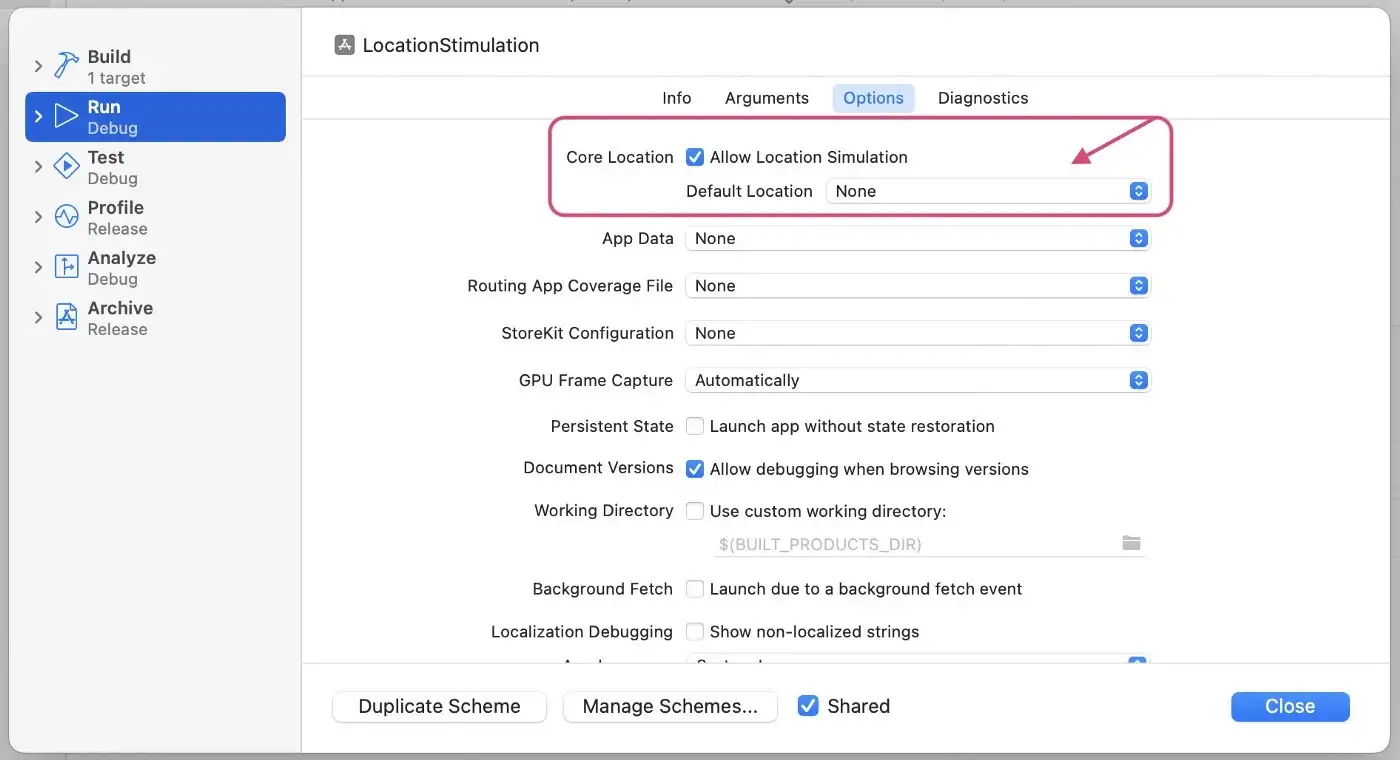
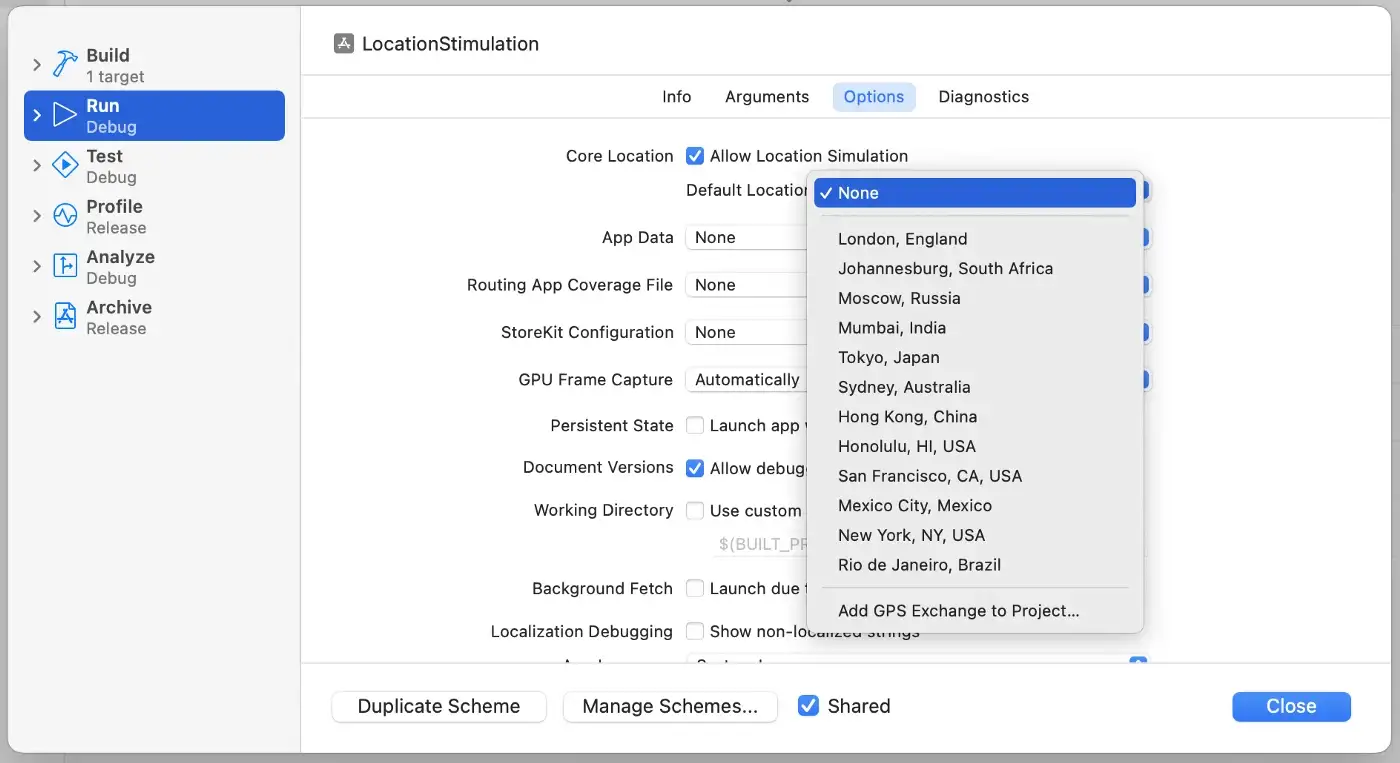
Make sure the Allow location simulation is selected, and you can select a location from the given option to simulate the simulator/device to point to that location when the app is launched.
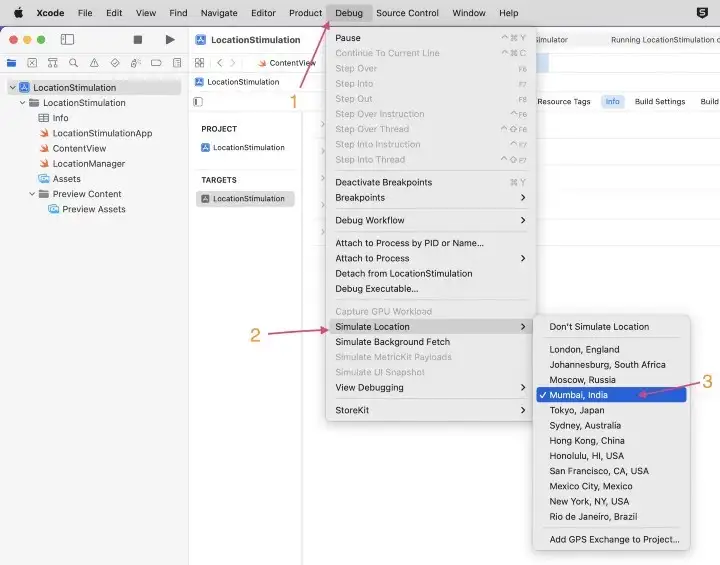
From the menu bar
Tap Debug from the Xcode menu bar and click simulate location. The same default locations options will be visible, as seen in the below screenshot:
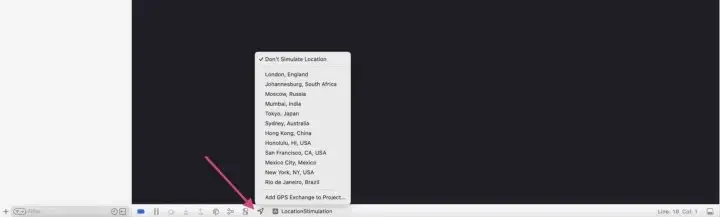
From the bottom debug bar
Note
This option will be enabled when the app is enabled with location permission
Custom static location
If we need to point our app to a particular location, for example, to point to my hometown, Tiruchirappalli (which is not available as part of the default list), we need the coordinates.
Tip
Coordinates of any location can be easily taken by right-clicking on Google maps
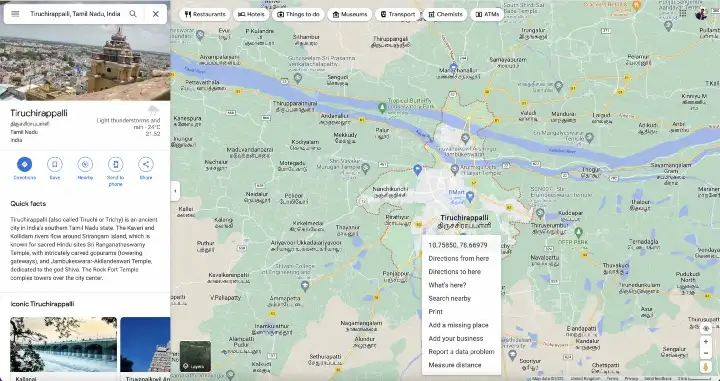
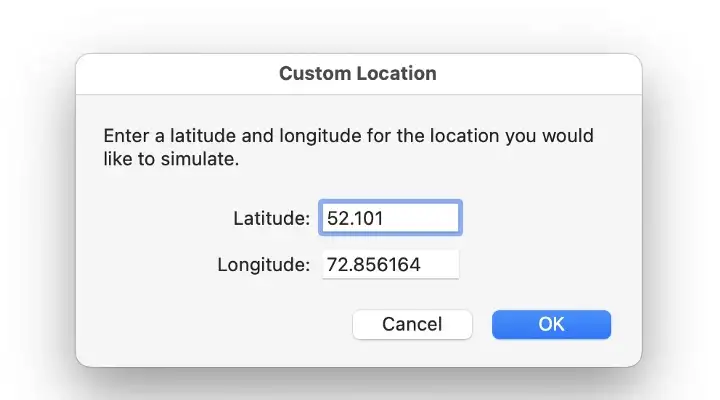
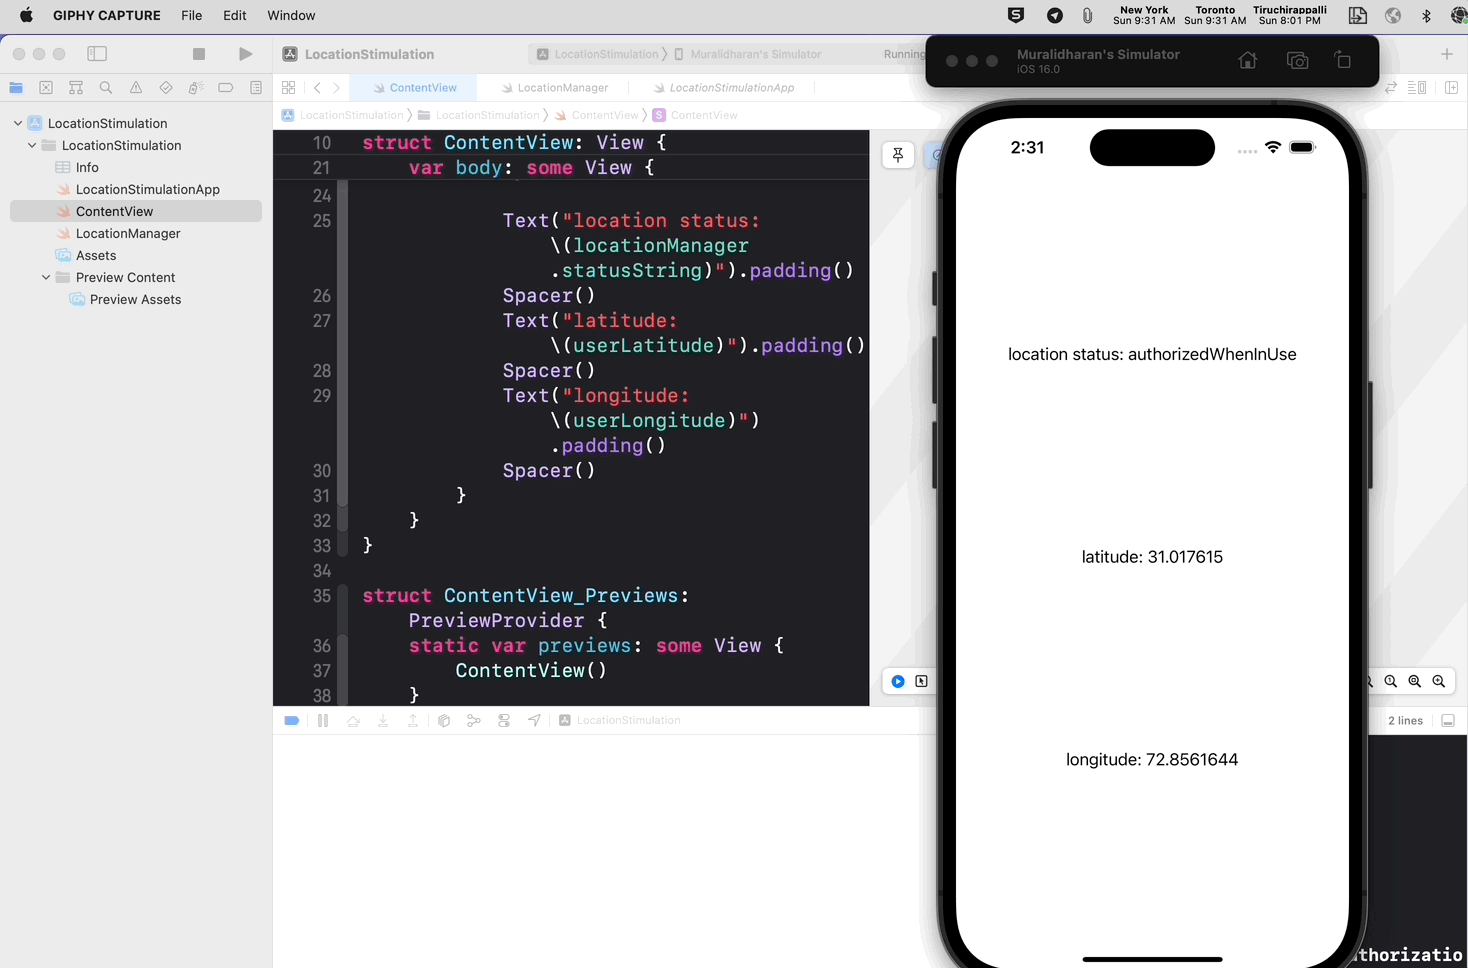
Once we get them, Go to the Simulator menu, tap Features → Custom Location, and enter the coordinates. The app will not start pointing to the custom location now.
Custom static location using GPX file
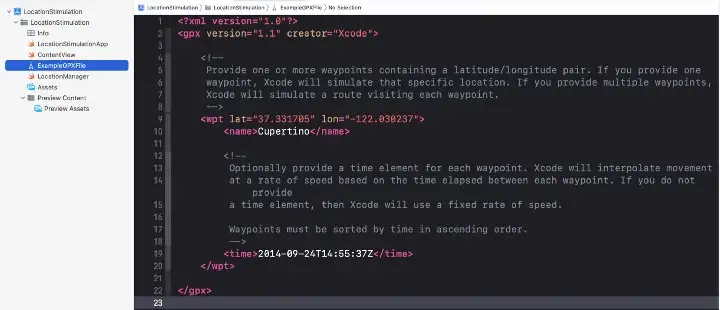
To simulate a location, we can use a GPX file.
GPX, or GPS Exchange Format, is an XML schema designed as a common GPS data format for software applications. It can be used to describe waypoints, tracks, and routes.
<?xml version="1.0" encoding="UTF-8"?>
<gpx xmlns:xsi="http://www.w3.org/2001/XMLSchema-instance" xmlns="http://www.topografix.com/GPX/1/1" xsi:schemaLocation="http://www.topografix.com/GPX/1/1 http://www.topografix.com/GPX/1/1/gpx.xsd" version="1.1" creator="Open GPX Tracker for iOS">
	<wpt lat="10.770822704808955" lon="78.88960536898259">
		<time>2022-12-04T19:13:26Z</time>
		<name>7:13:26 PM</name>
		<desc>04-Dec-2022 at 7:13:26 PM</desc>
	</wpt>
	<trk>
	</trk>
</gpx>
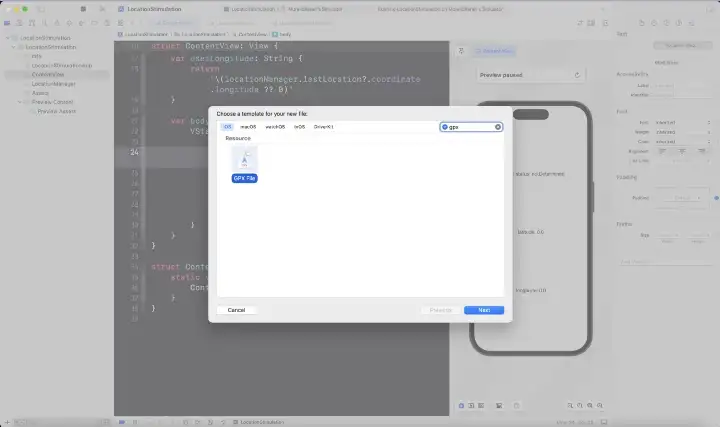
How to create a GPX file?
Xcode File Menu → New → File (Ctrl+N), Navigate to Resource column, you can able to find the GPX File option, click Next, define a name, and you are done
The default GPX file is the location of Apple Campus.
Tip
You can create a GPX file with only one waypoint (<wpt>) with a coordinate you want to simulate
Once its done, select it under the edit scheme location selection as shown below:

Tip
Here by default, Xcode created a waypoint with name and time, but those are not the mandatory properties.
We can save any number of location points(coordinates) as GPX files and use them in Xcode.
Dynamic (Multiple) Location Simulation
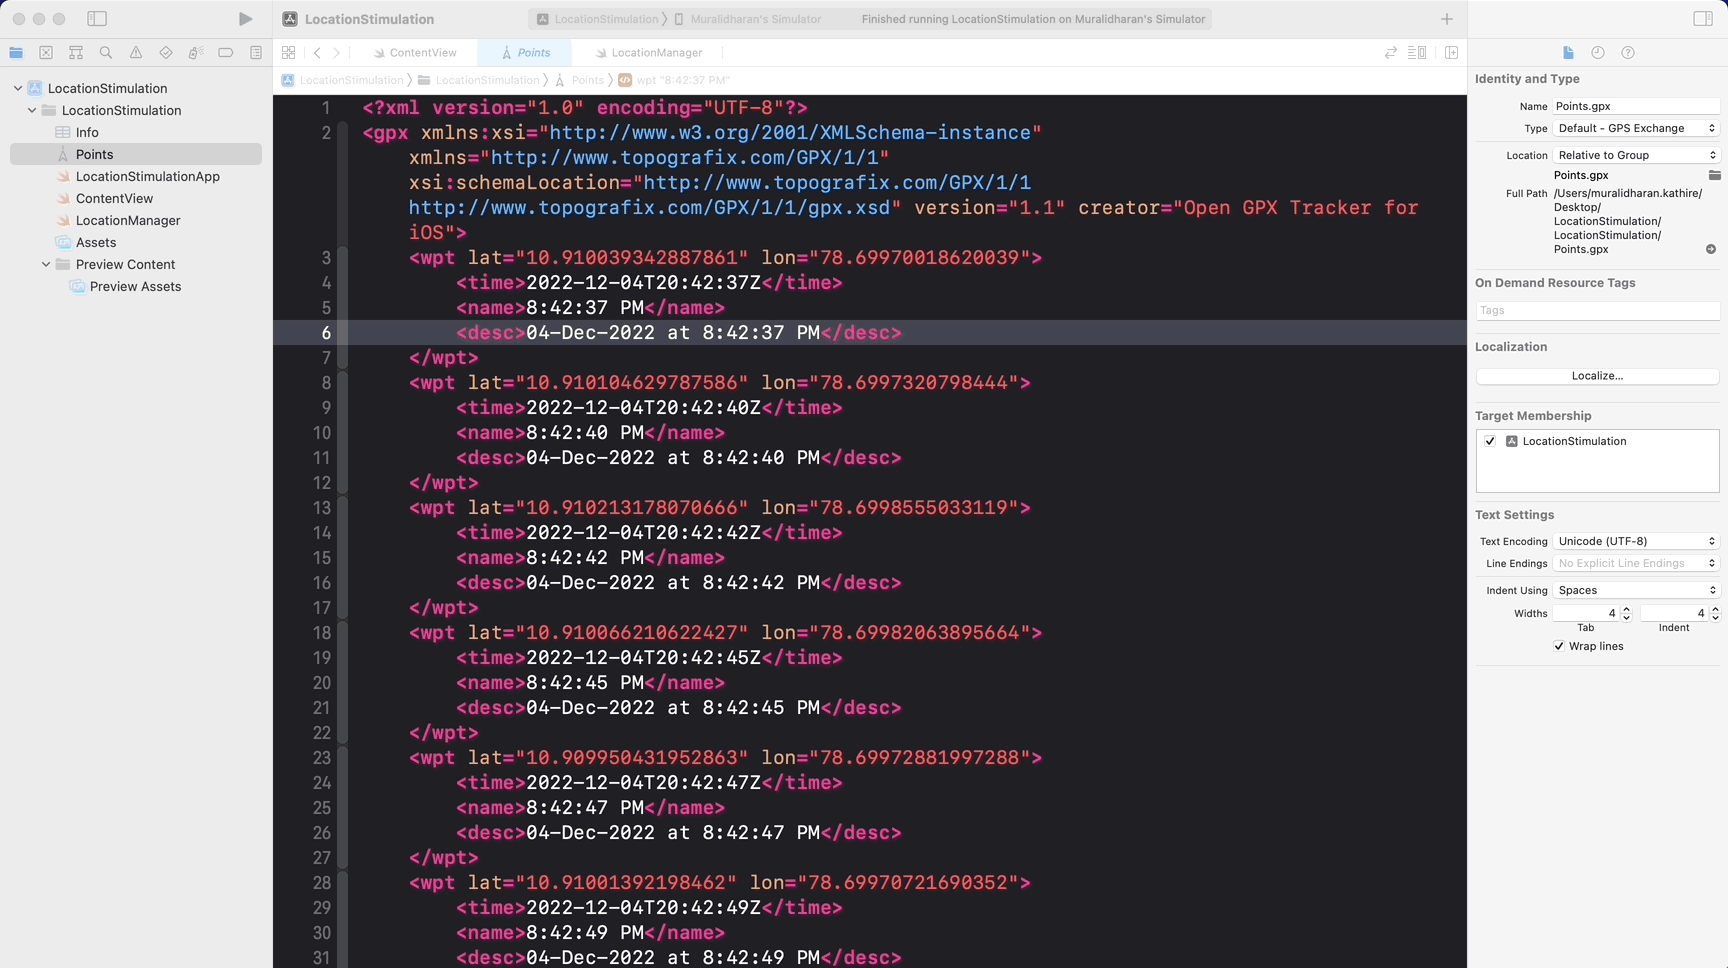
If our app needs to simulate a location movement like needed in a fitness app or location tracking feature in the app, then just a single custom coordinate is not enough. In those cases, we can need to use multiple <wpt> tags in a GPX file!
<?xml version="1.0" encoding="UTF-8"?>
<gpx xmlns:xsi="http://www.w3.org/2001/XMLSchema-instance" xmlns="http://www.topografix.com/GPX/1/1" xsi:schemaLocation="http://www.topografix.com/GPX/1/1 http://www.topografix.com/GPX/1/1/gpx.xsd" version="1.1" creator="Open GPX Tracker for iOS">
	<wpt lat="10.79800206061308" lon="78.6870669099">
		<time>2022-12-04T17:28:09Z</time>
		<name>5:28:09 PM</name>
		<desc>04-Dec-2022 at 5:28:09 PM</desc>
	</wpt>
	<wpt lat="10.813891267686442" lon="78.68684628670012">
		<time>2022-12-04T17:28:15Z</time>
		<name>5:28:15 PM</name>
		<desc>04-Dec-2022 at 5:30:15 PM</desc>
	</wpt>
	<wpt lat="10.85973245384515" lon="78.6952043334087">
		<time>2022-12-04T17:28:27Z</time>
		<name>5:28:27 PM</name>
		<desc>04-Dec-2022 at 5:32:27 PM</desc>
	</wpt>
	<wpt lat="10.910765553385477" lon="78.69941560728294">
		<time>2022-12-04T17:28:32Z</time>
		<name>5:28:32 PM</name>
		<desc>04-Dec-2022 at 5:34:32 PM</desc>
	</wpt>
	<trk>
	</trk>
</gpx>
Time (<time>) tag is needed here to simulate realistic movement, and Xcode will interpolate movement at a rate of speed based on the time elapsed between each waypoint. If you do not provide a time element, Xcode will use a fixed rate of speed.
The time taken from one point to the next is determined by the difference between the <time> elements
Time taken to travel from P0 to P1 = (P1 Time) - (P0 Time)
In the example above, the time for Point 1 is 2022–12–04T17:28:09Z and for Point 2 is 2022–12–04T17:30:15Z. It is a difference of two seconds. Xcode will use two seconds to go from Point 1 to Point 2. During this duration, the location will change, which means that if you implemented
func locationManager(
    _ manager: CLLocationManager,
    didUpdateLocations locations: [CLLocation]
)
you will receive the updates between the two seconds of Xcode simulating from Point 1 to Point 2.
Important
Waypoints must be sorted by time in ascending order
GPX tracker
There are many tools available to generate a GPX file with our dedicated inputs, one of them is GPXTracker an opensource tool that I use:
Install the app and open it. Simply long-tap on the location points where you want, as shown below:
![]()
Once you place the points, you can tap on save from the bottom bar with desired name and drag and drop the saved one to Xcode.
Xcode also comes with a few default dynamic location simulations (predefined moments), which you can use if they fit your app use case to debug:
- City Run
- City Bicycle Ride
- Freeway Drive
These three options will simulate a movement for running, riding, and driving, varying by speed. This is great for quick debugging.
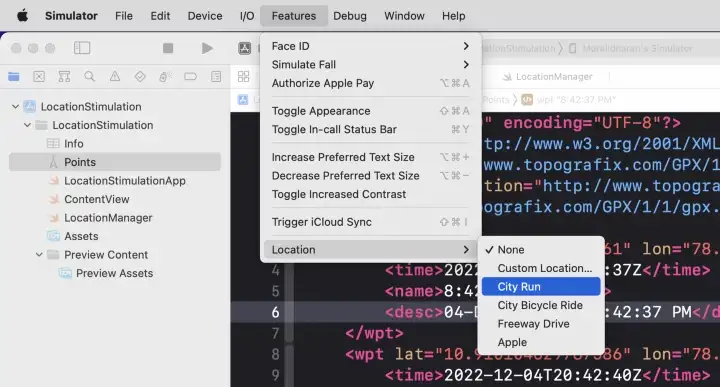
This is suitable for a quick test since you don’t have control over the movement route. To have better control, you have to simulate movement in Xcode with a GPX file.
Cons of location simulation
These simulations are generally for testing/implementation purposes since they do not help in the actual movement speed and accuracy.
Thanks for reading 🚀
If you have questions/suggestion, please add a comment below 👁️🗨️
If you liked this article, please share it with your friends and fellow Developers 🙏


This is a free third party commenting service we are using for you, which needs you to sign in to post a comment, but the good bit is you can stay anonymous while commenting.